BI Publisher, OTBI Reporting.
The information contained in this document is confidential and proprietary to Motifzone PVTLTD (known as Motifzone henceforth).
Introduction and Basic creation of reports including templates (excel, RTF, etext)
- RTF: Ideal for formatted reports with branding and complex layouts.
- Excel: Useful for data analysis and user-friendly manipulation.
- eText: Typically used for electronic data transfers (e.g., EFT or EDI).
BI Publisher is a robust tool within Oracle Fusion that allows users to design, generate, and schedule reports using these flexible templates. Below are the key steps to create reports using BI Publisher:
- Define a Data Model: Establish the data source, data sets, and parameters.
- Create a Report Layout: Use BI Publisher Desktop or online tools to design templates in RTF, Excel, or eText format.
- Upload and Associate Templates: Upload the layout templates and associate them with the data model.
- Generate and Test Reports: Run the report using sample data to verify the layout and results.
- Schedule or Publish Reports: Automate distribution via email, FTP, or online access within Oracle Fusion.
RTF Report
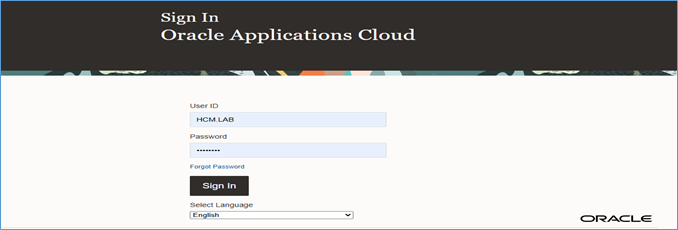
Step 1: Log in to Oracle Fusion Applications & Define the Data Model
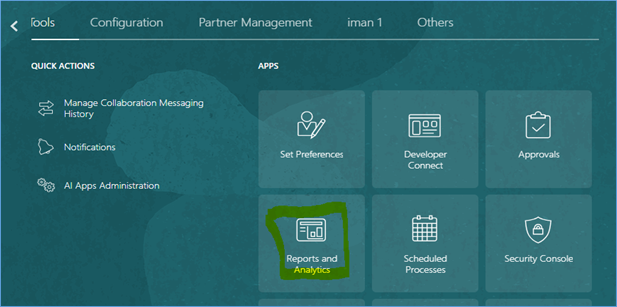
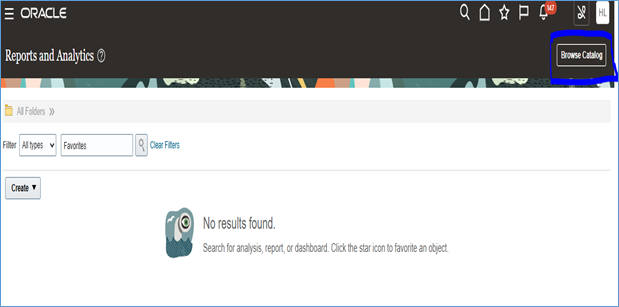
Step 2: To Open the BI Publisher use the POD link/analytics–
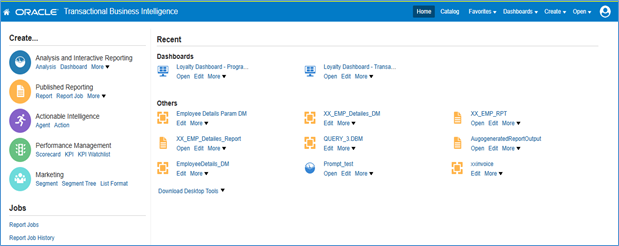
Click on Browser Catalog
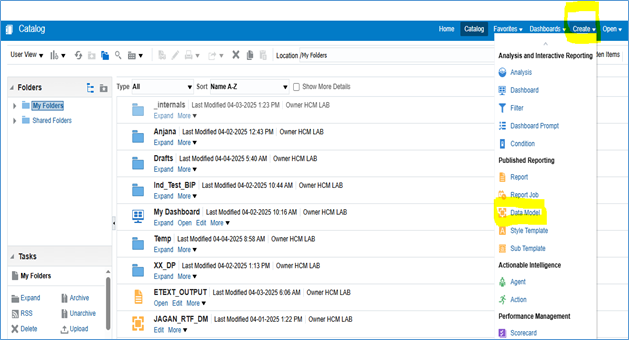
Click on Create Option-Select Data model and click on it.
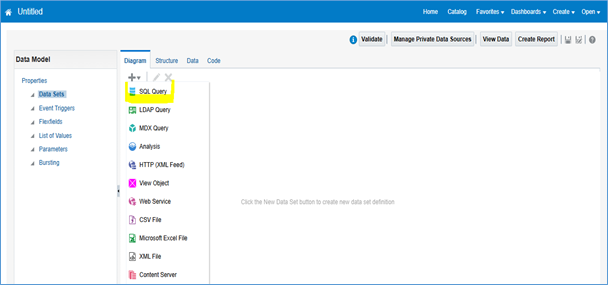
Step 3: Click on Diagram -Select SQL Query Option and Click on it.
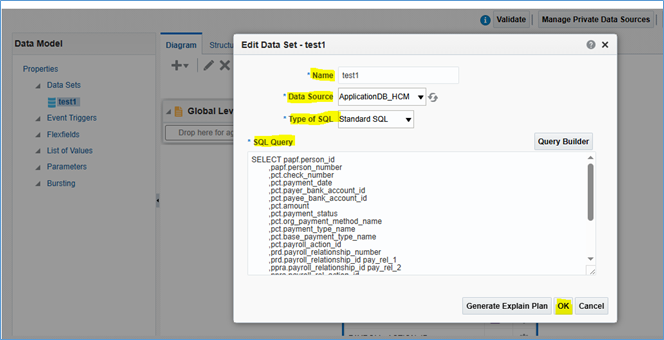
Step 4: Write name –select data source-ApplicationDB_HCM and write a query to get the data which is needed for report under SQL Query Box after that click on OK button.
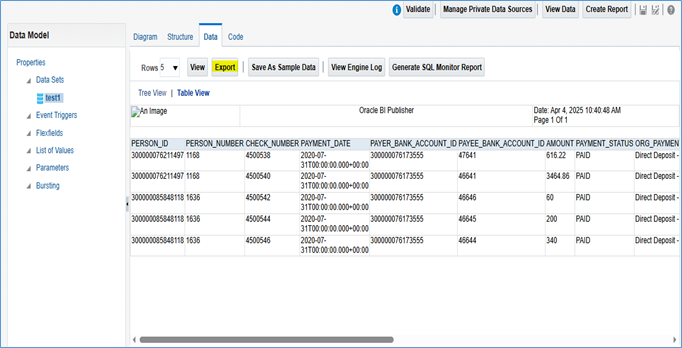
Step 5: Once data model got created, run the query and save the sample output to create a report on that.
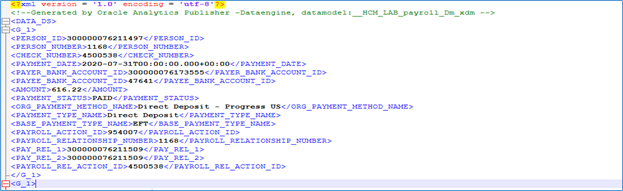
Step 6: Now when you get the data we can export the xml file to prepare our template.
–XML file will show like below example
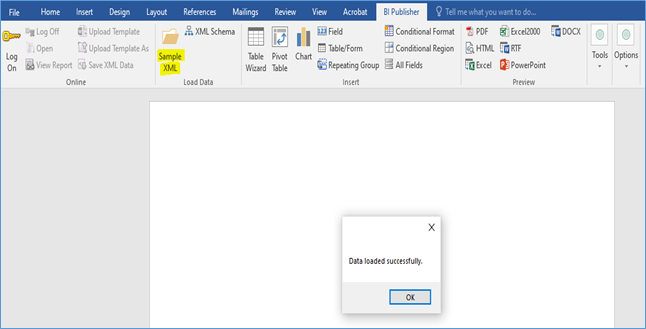
Step 7: The first step in creating the template is to load the XML file downloaded in the previous step. To do this, ensure that the BI Publisher plugin is installed in Microsoft Word. This plugin can be easily obtained from the Oracle Software Download section.
https://www.oracle.com/middleware/technologies/bi-publisher/downloads.html
Go to BI Publisher tab and click on sample xml which will ask you to load the xml file. Browse the downloaded xml file in your local after that Showing Pop Up “Data loaded successfully” on the screen.
Step 8: Click on all fields; it will automatically create template based on xml tags.
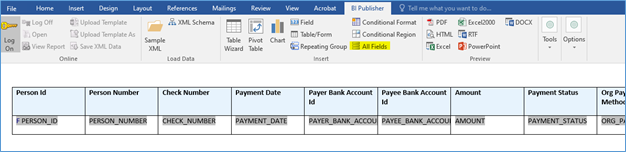
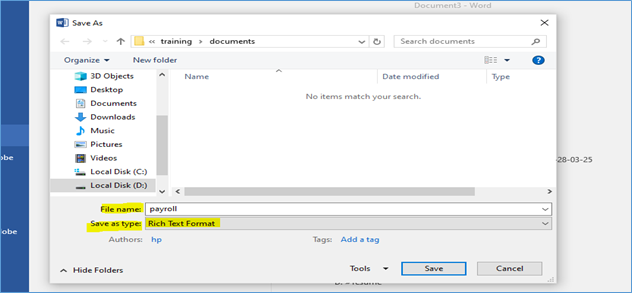
Save the template in local as given below-
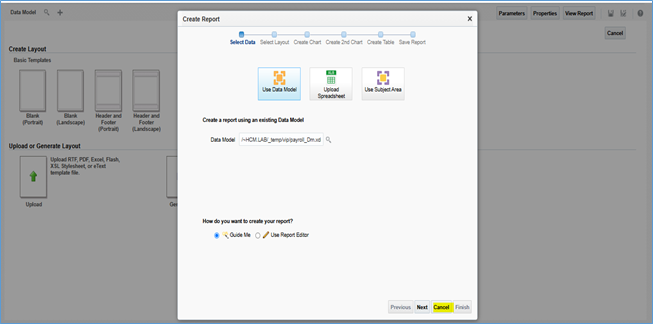
Step 9: To attach the template we have to create a report and link data model to template.

Click on Create Report Button and it will pop up another screen. Click Cancel button as we already have template which we have to upload. Select the data model in upper left corner by clicking on search button.
Step 10: Click on UPLOAD to load the template created earlier and choose the UPLOAD option.
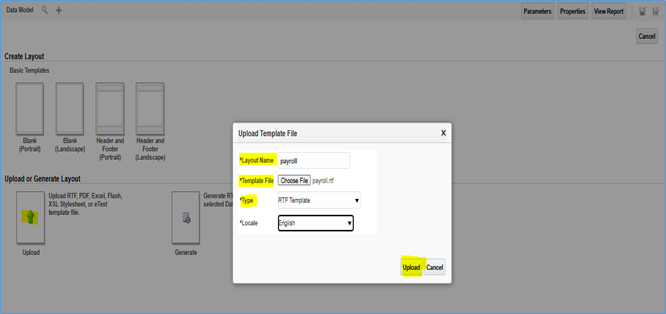
Step 11: Mapped the report with Data model –Click on magnifier and select the Data Model Path –Click on Ok. button. Give the name of the report and save.
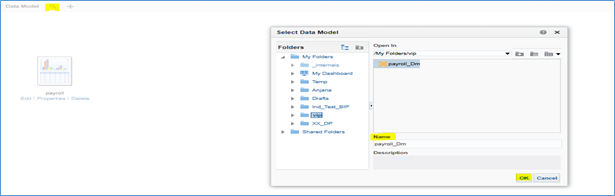
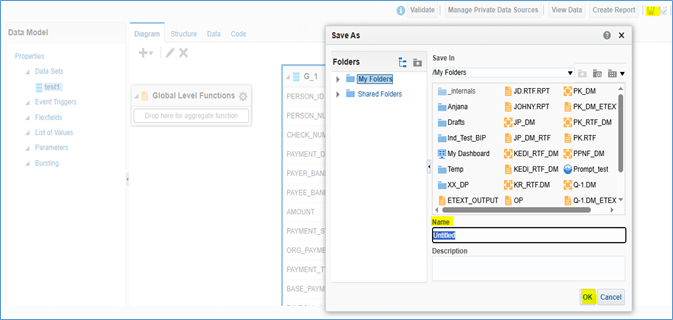
Step 12: Click on save button which on right side on top and select the path where is Data Model exist and give the name of report and click on Save button. Report create with extension of XDO and data model with extension XDM.

Step 13: For viewing the report click on view report which on right hand side top corner and report will display on screen as given below.
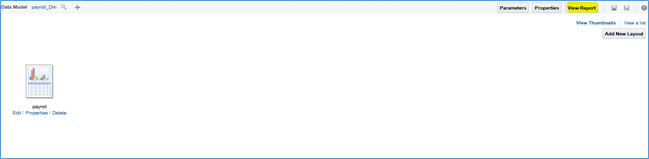
Report View

Excel Report
An Excel template in BI Publisher is:
- A pre-formatted Excel file (.xlsx) that contains layout instructions, formulas, and formatting.
- It uses BI Publisher-specific syntax (with <?…?> tags) to map and display data from a data model (XML data).
- It allows users to take advantage of Excel’s native features, such as formulas, pivot tables, charts, and conditional formatting.
As mentioned in the steps above, Figures 1 to 7 remain the same. After exporting the data to an XML file, follow the steps outlined below.
Step 1: The first step in creating the template is to load the XML file downloaded in the previous step.
- To do this, ensure that the BI Publisher plugin is installed in Microsoft Excel.
- This plugin can be easily obtained from the Oracle Software Download section.
https://www.oracle.com/middleware/technologies/bi-publisher/downloads.html
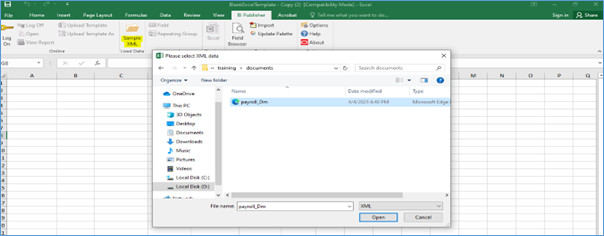
Go to BI Publisher tab and click on sample xml which will ask you to load the xml file. Browse the downloaded xml file in your local and click on open button.
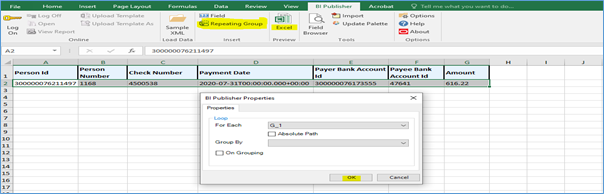
Step 2: Write the all headings of and select the next row for data – Click on Field option then field Pop-up is opened and insert the one by one field through insert button.
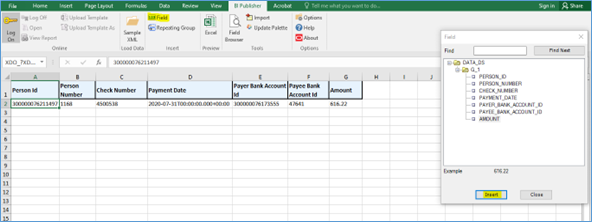
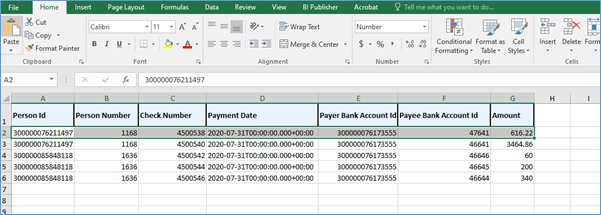
Step 3: Select the all fields and click on Repeating Group, then Pop-up window shown on screen after that click on “OK” button. Click on Excel then report will open in New excel file which is shown in next image-(Fig24)
All data is showing in Excel sheet.
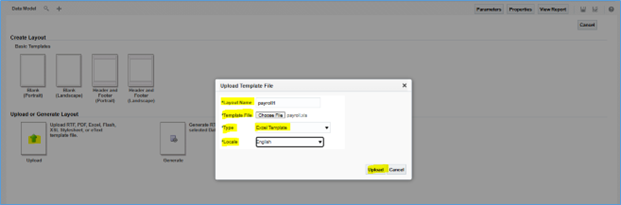
Step 4: Follow the same steps outlined in the previous figures for uploading a template; however, instead of referring to Fig 10, this step specifically involves selecting the Excel Template type from the dropdown list when uploading the template.
The remaining steps—mapping the data model and saving the report—are the same as described in the earlier figures (Fig 11 to 13).
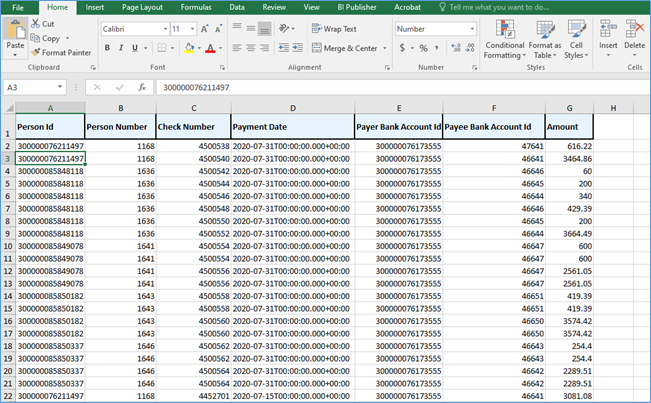
When click on view report then showing the message Report Completed and automatically download in Excel sheet.

All data is automatically compiled in Excel Report after uploading the excel template, make sure steps should be follow according to given instructions and refers the figures.
eText
An eText template is:
- A plain text format template that defines how the data should be structured in the output file.
- Used to produce flat files (like .txt, .dat, .csv) instead of visual reports (like PDF or Excel).
- Typically required in scenarios like:
- Bank payment files
- Tax reports
- EDI (Electronic Data Interchange) files
- Interfaces with third-party systems
As mentioned in the steps above, Figures 1 to 7 remain the same. After exporting the data to an XML file, follow the steps outlined below-
Step 1: The first step in creating the template is to load the XML file downloaded in the previous step. To do this, ensure that the BI Publisher plugin is installed in Microsoft Word. This plugin can be easily obtained from the Oracle Software Download section.
https://www.oracle.com/middleware/technologies/bi-publisher/downloads.html
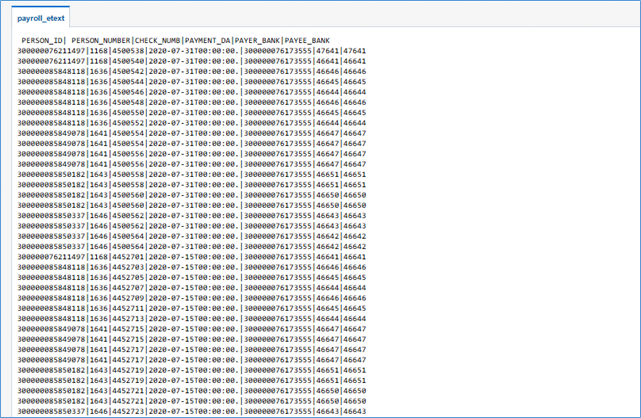
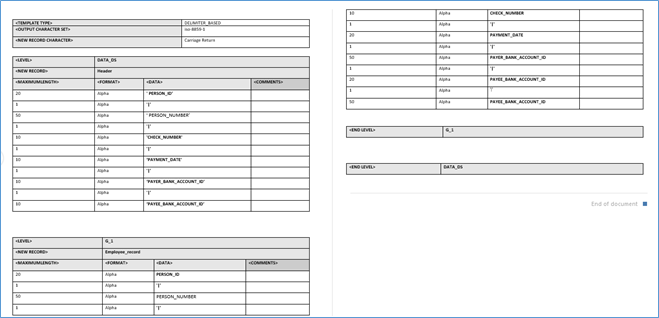
Make the format of eText according to XML file where is mention about DG (Data Group) name, headings of records as shown in Fig27
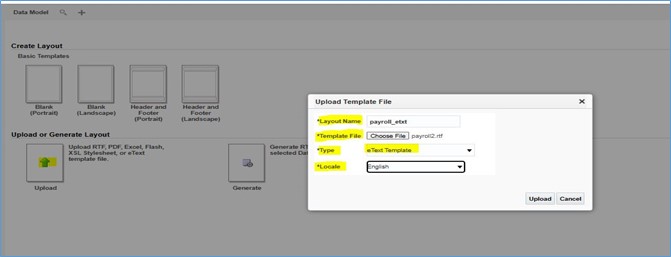
Step 2: Follow the same steps outlined in the previous figures for uploading a template; however, instead of referring to Fig 10, this step specifically involves selecting the eText Template type from the dropdown list when uploading the template.
The remaining steps—mapping the data model and saving the report—are the same as described in the earlier figures (Fig 11 to 13).
Step 3: Click on view report then eText Report is displaying on the screen.